Introduction:
The functionality of electrical outlets is crucial for powering our daily lives, from charging devices to operating appliances. However, like any component of a home’s electrical system, outlets can experience wear and tear over time, leading to issues such as loose connections, faulty wiring, or even complete failure. When faced with a malfunctioning electrical outlet, many homeowners wonder: can you repair it yourself? In this comprehensive guide, we’ll explore the intricacies of electrical outlet repair, discussing common problems, safety considerations, and the steps involved in DIY repairs.
Understanding Electrical Outlets:
Before delving into the specifics of outlet repair, it’s essential to understand the basic components of an electrical outlet. Standard outlets consist of three main parts: the receptacle (where you plug in devices), the electrical box (housing the wiring connections), and the cover plate (which provides a protective barrier). Inside the electrical box, wires connect the outlet to the electrical circuit, allowing electricity to flow to connected devices.Can you repair an electrical outlet yourself? Absolutely! With the right knowledge and safety precautions, repairing an electrical outlet can be a DIY task. However, it’s crucial to ensure the power is turned off, use appropriate tools, and follow proper wiring procedures. If you’re uncertain or uncomfortable, seeking professional assistance is always a safe choice
Common Problems with Electrical Outlets:
Electrical outlets can encounter a variety of issues over time, ranging from minor nuisances to serious safety hazards. Some of the most common problems include:
- Loose Outlets: Over time, the connections inside an outlet can loosen due to repeated use or vibrations. Loose outlets may cause plugs to fall out or create intermittent power interruptions.
- Dead Outlets: A dead outlet is one that no longer provides power to connected devices. This can be caused by a variety of factors, including tripped circuit breakers, faulty wiring, or internal damage to the outlet itself.
- Overheating Outlets: If an outlet becomes hot to the touch or emits a burning odor, it may be overheating. This can occur due to overloaded circuits, loose connections, or faulty wiring, and poses a fire risk if not addressed promptly.
- Sparking Outlets: Sparks or arcing at an outlet are clear signs of electrical problems and should be addressed immediately. This can indicate loose connections, damaged wiring, or overloaded circuits, all of which pose safety hazards.
Safety Considerations:
Before attempting any electrical repairs, it’s crucial to prioritize safety. Working with electricity can be dangerous, and even seemingly minor mistakes can lead to serious injuries or property damage. Here are some essential safety considerations to keep in mind:
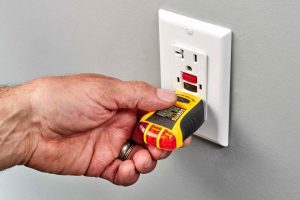
- Turn Off Power: Before working on an electrical outlet, always turn off power to the circuit at the breaker box. Use a voltage tester to verify that the power is off before proceeding with repairs.
- Use Proper Tools: Make sure you have the appropriate tools for the job, including insulated screwdrivers, wire strippers, and a voltage tester. Avoid using damaged or inappropriate tools, as they can increase the risk of accidents.
- Wear Protective Gear: When working with electricity, wear insulated gloves and safety glasses to protect yourself from potential shocks or burns.
- Know Your Limits: Electrical work can be complex, and it’s essential to know when to call in a professional. If you’re unsure about how to safely perform a repair or if the problem is beyond your skill level, don’t hesitate to seek help from a licensed electrician.
Steps to Repair an Electrical Outlet:
With safety in mind, let’s explore the steps involved in repairing a common electrical outlet issue:
- Turn Off Power: Begin by turning off power to the circuit at the breaker box. Use a voltage tester to confirm that the power is off before proceeding.
- Remove Cover Plate: Unscrew the cover plate from the outlet using a screwdriver. Set the cover plate aside.
- Inspect Wiring Connections: Carefully examine the wiring connections inside the electrical box. Look for loose or damaged wires, and tighten any loose connections using a screwdriver.
- Test Outlet: Once the wiring connections are secure, use a voltage tester to check for power at the outlet. If the tester indicates power, proceed to the next step. If not, double-check the wiring connections and breaker box to ensure power is restored.
- Replace Outlet: If the outlet itself is damaged or malfunctioning, it may need to be replaced. Disconnect the wiring from the old outlet and remove it from the electrical box. Install a new outlet following the manufacturer’s instructions, making sure to match the wiring connections correctly.
- Reassemble: Once the new outlet is installed, reattach the wiring connections and secure the outlet inside the electrical box. Replace the cover plate and screw it into place.
- Test Again: After completing the repair, use a voltage tester to verify that the outlet is receiving power and functioning correctly. Test the outlet with a device to ensure it provides power reliably.
Conclusion:
Repairing an electrical outlet yourself can be a feasible task for those comfortable working with electricity and following safety protocols. By understanding the basics of outlet repair, prioritizing safety considerations, and following the appropriate steps, you can address common outlet issues and ensure the continued functionality and safety of your home’s electrical system. However, if you’re unsure about how to safely perform a repair or encounter complications during the process, don’t hesitate to seek assistance from a qualified electrician. With proper care and attention, you can maintain a safe and reliable electrical infrastructure in your home for years to come.


